3D printing can be used in many different ways, opening up previously impossible possibilities, especially in terms of design. However, these possibilities can only be fully exploited if 3D printing works the way you want it to. Unfortunately, this is not always the case, so even the simplest models sometimes don’t want to print properly. But why this problem? Where does it come from? We have looked at the various errors or defects that a user may encounter and the associated solutions. These errors concern here only the filament-based FDM technology. Of course, there are other defects when it comes to other processes and materials. The current list of 3D printing problems is not exhaustive, we have grouped together the main challenges that users generally face.
A 3D printing problem related to the adhesion
The first layers of a print are crucial: as they form the basis of the model, it is vital that they adhere to the printing plate. If this is not the case, 3D printing may have some defects. First of all, it is important to clean the 3D printer build plate and nozzle thoroughly, as material residues can affect the print and therefore the adhesion. Also note that not all trays have the same type of surface, which can affect your printing: thermoplastics will not adhere to them in the same way. For example, a Build-Tak surface is particularly suitable for PLA printing.
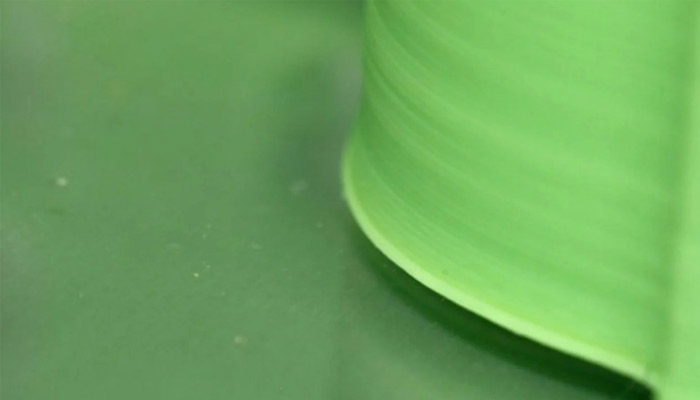
Warping can cause the part to become detached.
A first problem with 3D printing is warping, or warping due to insufficient adhesion to the plate: the corners of the printed part swell upwards, sometimes causing it to come off the plate entirely. It is particularly frequent when printing large or long parts with materials such as ABS, nylon, PEEK, etc. This is due to the fact that plastic parts often still shrink after printing when they cool down. For example, if you print ABS at 230°C and then let it cool down to room temperature, it shrinks by almost 1.5%. The use of a heating plate is then strongly recommended, as it keeps the filament at the glass transition temperature and reduces the contraction. The optimal temperature of the printing plate is usually found on the filament package.
Also be aware that the printing speed is of great importance, especially for the first layer. One solution could therefore be to reduce this speed to give the material enough time to adhere to the surface of the build platform.
On the other hand, it may happen that the piece sticks too well to the platform so that it is difficult to remove. As it is absolutely necessary that the model is completely cooled down, the tray – with the workpiece on it – can be placed in the freezer. If it still does not lose its adhesion, you can try to remove it with a spatula. However, this must be done with care, otherwise the model will be damaged or the tray scratched.

The piece can be removed with a spatula.
Another solution to counter this problem of 3D printing is to put the tray and the part in a hot water bath. The glass transition temperature must not be exceeded, otherwise the model may deform. In addition, it is possible to modify its adhesion parameters in the software. Deselecting additional adhesion parameters, such as Edge or Raft, should make it even easier to detach the model.
Blistering
The second 3D printing defect is what is called elephant feet or blisters: the lower layers swell outwards. This 3D printing problem occurs when the lower layers have not cooled sufficiently, but the weight of the rest of the part acts on them, pushing them outward.
The first solution may be to adjust the build plate. You must make sure it is level, otherwise there will be different distances between the plate and the nozzle. Another way to eliminate the defect could be to reduce the temperature of the printing bed. It is important to cool the lower layers sufficiently, but not too quickly, otherwise the deformation problem mentioned above will occur. You can choose a cooling system or you can put more parts on the plate: the printer will take longer to design the different models, which will allow more time for cooling.
The first layer is more swollen than the others.
Under-extrusion
The third problem with 3D printing is under-extrusion. This means that not enough material comes out of the nozzle. It is noticeable by the empty spaces between the layers, i.e. they are not properly joined. The under-extrusion is due to the fact that the amount of material coming out of the nozzle is less than the software expects, because 3D printers do not yet provide this type of information. There are several causes for this phenomenon.
The problem may be related to the diameter of the filament: it must be well specified in the software. If the filament diameters match, but the problem of under-extrusion remains, the amount of extruded material must be modified. This is done with the extrusion multiplier: by increasing it, more material is extruded. It may be advisable to proceed in steps of 5% and to print a test version after each increase to ensure that the correct amount of material is extruded. Under-extrusion can also be related to a clogged nozzle or a blocked filament upstream of the extruder.
Over-extrusion
The counterpart of under-extrusion is over-extrusion. As you can already imagine, this 3D printing problem concerns an excess of extruded material. This has a negative effect on external dimensions and print quality. Basically, the same solutions are available here as for under-extrusion, except that in this case, the extrusion multiplier has to be reduced in order to extrude less material.
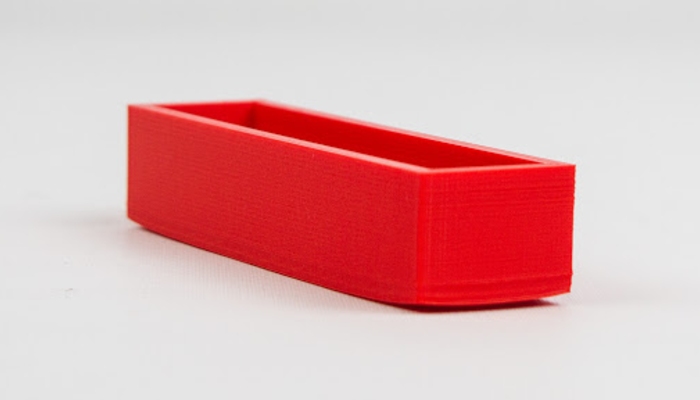
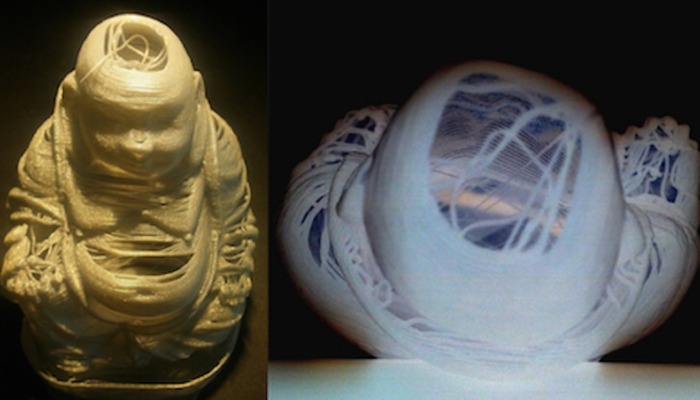
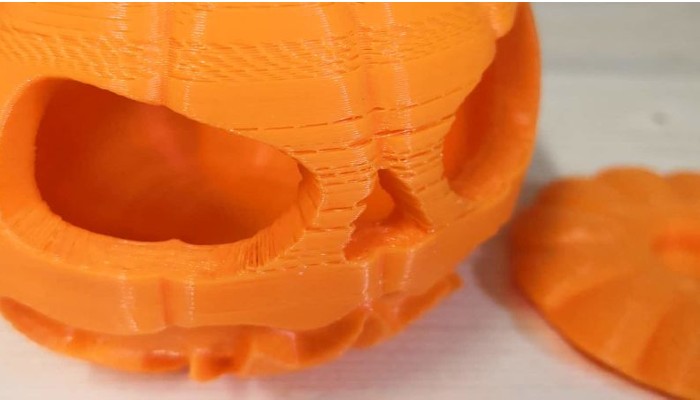
Holes in my 3D printed part
Once 3D printing is completed, holes in the top layer may form if the filament has not cooled properly or if the manufacturing parameters are not correct. This problem with 3D printing is often due to the design of the part, when it is hollow or with a honeycomb structure. The solution seems obvious: the temperature has to be adjusted; however, solutions can also be found on the printing parameters side.
The first thing to check is whether you have enough top layers. If the inside is hollow and you try to print a 100% solid layer, it is likely that it will fall or sink into the empty spaces. To avoid this, you need several solid layers at the top of the model. It is recommended that you have a thickness of 0.5 mm on the top edge. The surface quality improves with each additional layer. Another solution could be to increase the filling on the inside. The higher the filling density, the smaller the distances between the different filling walls.
There are several solutions to avoid these holes in the upper layers
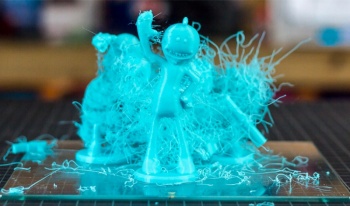
A 3D printing problem linked to the extruded filament: stringing
The phenomenon of “stringing”, corresponds to thin threads of material left between the sections of a 3D printed part. Typically, this 3D printing problem is related to the fact that the material continues to exit the nozzle as it moves from one point to another when it should not. Normally, the 3D printer is able to prevent the nozzle from extruding the filament through shrinkage. If this parameter is not set correctly, these filaments may appear.
A solution to this problem could be to change the shrinkage parameters. You can change the shrinkage distance but also the shrinkage speed. The optimal value for the speed of filament retraction varies, but as a guide, you can set a value between 20 to 100 mm per second. Another solution is to reduce the extrusion temperature: if the extrusion temperature is too high, the plastic is more liquid than it should be. In addition, a fan will no longer be able to cool the filament properly and the filament will flow out of the nozzle more easily or in an uncontrolled manner. The last thing you can do is to shorten the travel distances and/or increase the travel speed.
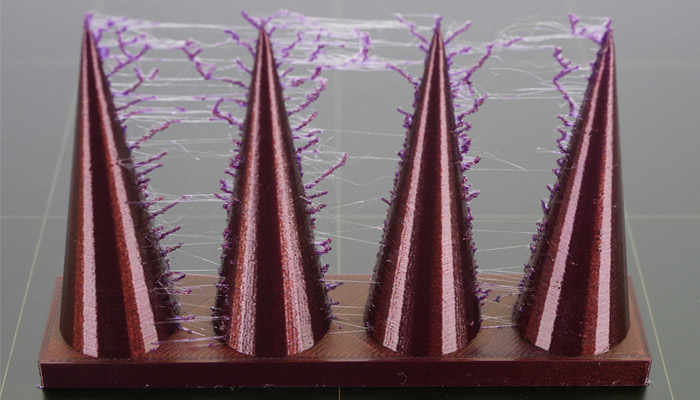
Threads appear between the different parts
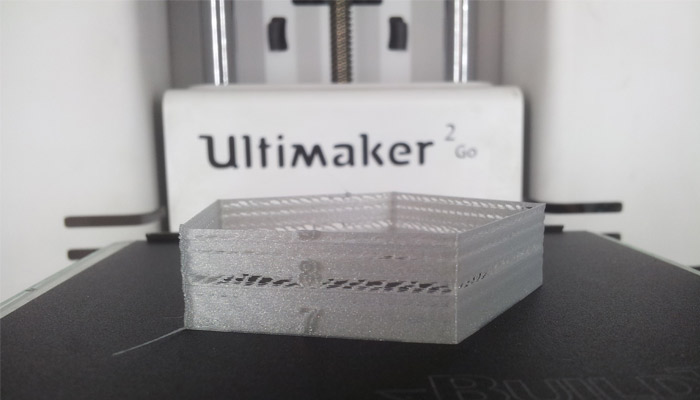
Layer seperation
If the different extruded layers are not well welded together, a separation will occur between some of them. A solution to this problem in 3D printing can be the reduction of the layer height. Generally, it is said that the height should not exceed 80% of the nozzle outlet diameter. If the layer height is higher than this limit, the layers will only be applied loosely and therefore will not bind with the previous layer. If the layer height has already been optimized, another solution may be to increase the printing temperature. This makes sense, because hot plastic adheres better than cold plastic. The processing temperature is indicated on the packaging of each filament. This is the only way to ensure optimal layer adhesion.
Separations may occur between some layers
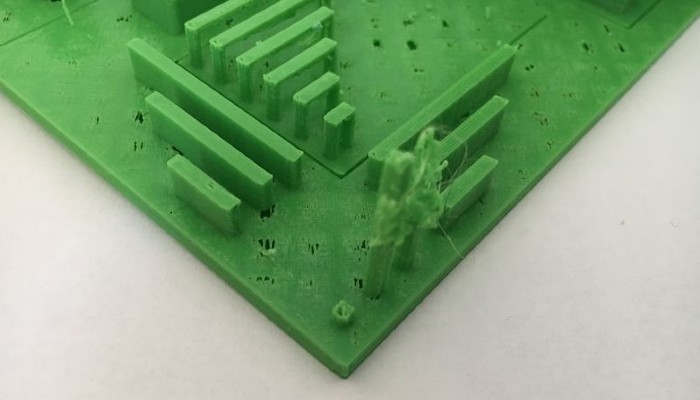
Fine details are not printed
As 3D printing is currently used to exploit design possibilities, it is important to obtain fine and precise details. However, FDM technology has its limitations and if you try to print areas finer than the nozzle diameter, you will have problems.
Therefore, the most obvious solution is to use a smaller diameter nozzle, if possible. Some settings in your software will also allow you to print finer areas with specific profiles. In addition, the choice of a high quality filament can make a difference. However, if all this doesn’t help, all that remains is to redraw the part with thicker features. Slicing software such as Cura, Z-Suite or Simplify3D can help you in this area, as they check that your 3D model does not contain any thin-walled components.
As you will have understood, a 3D printing problem can quickly come up and there are many of them. Finding its cause does not always seem easy, which makes it even more difficult to correct. However, some manufacturers have started to develop 3D software that can identify printing defects and correct them directly. In any case, you are encouraged to test different parameters of your machine to see what works and what doesn’t. Don’t be discouraged, practice is key! Don’t hesitate to tell us about your 3D printing problem in the comments of the article or with the members of the 3Dnatives forum.