Nexa3D was born from a meeting between Avi Reichental, former CEO of 3D Systems, and the inventors of the “Lubricant Sublayer Photo-curing” (LSPc) technology. Interested in the developments of the latter, Reichental decided to create Nexa3D in 2015. And three years later, in 2018, the first 3D printer of the Californian manufacturer was unveiled.
Historically, Nexa3D was exclusively positioned on the industrial 3D printer market, before expanding its range more recently with solutions for the dental sector as well as the arrival of its first desktop machine, the XiP. Thus, the different ranges of the brand now cover engineering (symbolized by an E in the nomenclature of the machines, like the NXE200), dental (symbolized by a D) and the desktop machine market with the XiP. In parallel to its resin ranges, the manufacturer also offers a high performance SLS printer, the QLS.
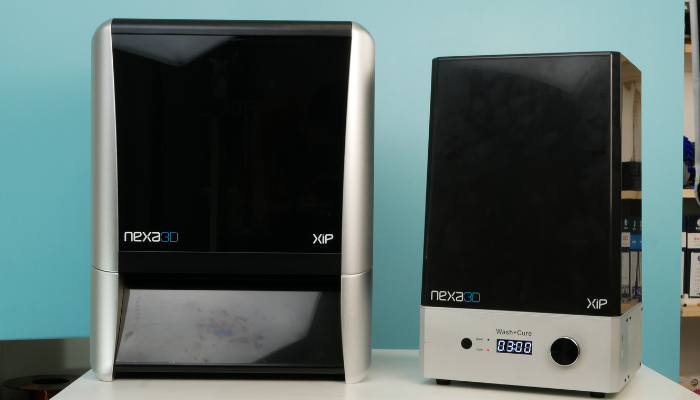
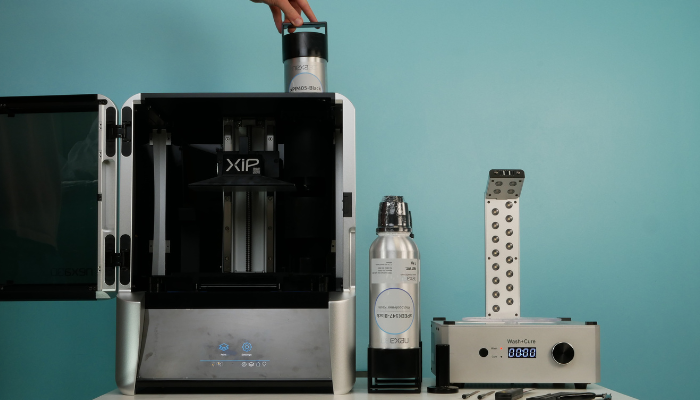
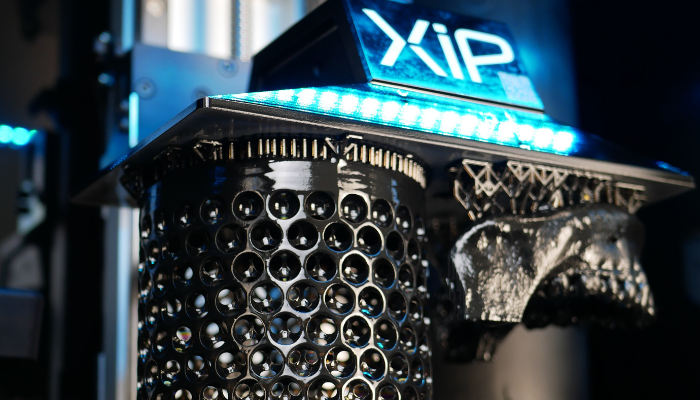
The XiP ecosystem includes the printer as well as a post-processing machine and an air filtration system
Unveiled at the last Formnext trade show in Frankfurt, the XiP ecosystem includes a 3D printer, a post-processing machine, an air filtration system and proprietary resin cartridges. With its compact size and entry-level price of $6,295, the XiP is presented as a manufacturer’s entry-level machine and is aimed at a wider target audience.
After several months of anticipation from the market, the XiP was released last April. In our 3Dnatives Lab, we did a complete test of the machine. Learn what we thought after weeks of testing.
Unboxing the XiP 3D Printer
Despite its compact size, the XiP came to us on a full pallet. The pallet included the printer box, the post-processing machine, accessories, spare parts and materials. Unpacking the XiP is easy, as once the four clips are removed, the top part of the box separates from the bottom one, giving access to the pre-assembled machine. Inside the box, there is also the power supply unit and a water bottle with the brand’s colors.
In the other boxes, we found the post-processing machine, also already assembled, as well as a relatively complete set of accessories, namely a cleaning tray, a plastic post-processing tray, a silicone tool kit (containing a pair of cutting pliers, a metal and a plastic spatula as well as two files), a filter and a funnel to facilitate the change of resin, a single pair of gloves and an accessory for cleaning the resin vat. Also included are the two aluminum vats and a pack of 3 spare Everlast-2 membranes.
Although the accessory kit provided is quite complete, it would have been nice to have a pair of needle-nose pliers and tweezers. These two tools are particularly useful when removing brackets. When using the XiP, it will be necessary to wear a pair of gloves. Although the XiP comes with one pair, you will need to buy more quickly as they are single use.
As our XiP was one of the first to be delivered in Europe, the air filtration machine was not included, although it is included as standard in all XiP packages. This machine, installed next to the XiP on the work surface, draws in the air around it and works with HEPA and activated carbon filters to reduce VOCs (Volatile Organic Compounds) associated with 3D printing. While using the filtration machine, it is recommended to wear a mask, although not provided by the manufacturer.
Visually, the XiP and the post-processing machine feature a combination of aluminum and black plastic panels. The resin cartridges are also made of aluminum. The manufacturer justifies its choice as being a more sustainable one, aluminum being the most recycled raw material. Thus, the 3D printer and the post-processing machine are made of an aluminum frame, just like the resin cartridges. In addition to its ecological appeal, aluminum gives a “premium”, minimalist and modern aspect to the Nexa3D ecosystem.
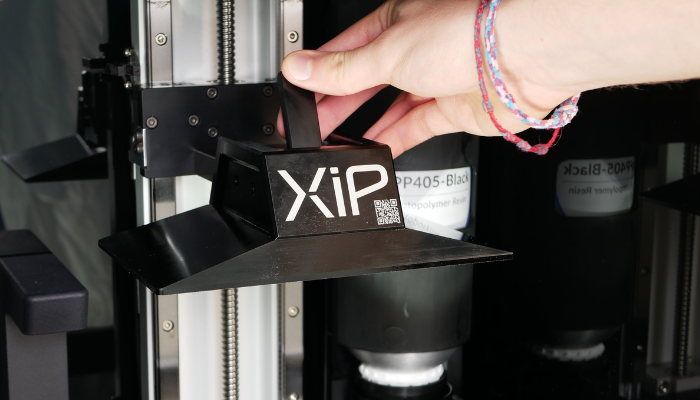
The tray’s fixing system allows for easy handling and a firm hold
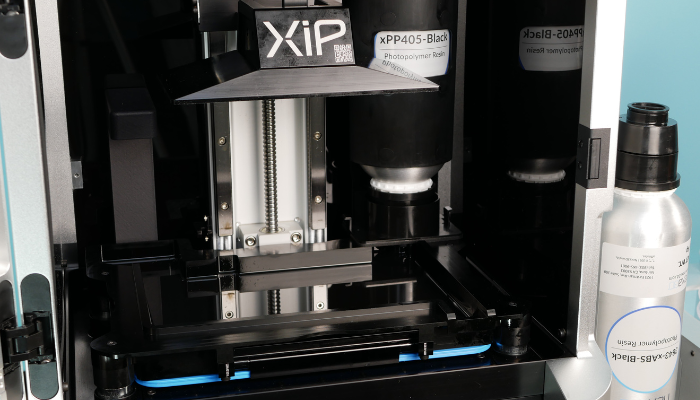
When we looked closer inside the machine, we discovered the fixing system and the parallelism of the plate which testify to the robustness of the printer. At the back, users will find all the XiP different ways to connect (namely: a USB B port, an RJ 45 connector and a power socket).
Finally, although similar in size (420x350x530mm or 77L) to other models on the market, it is interesting to note that the Nexa3D XiP 3D printer is distinguished by a slightly larger printing volume (195x115x210mm or 4.8L) than its direct competitors.
Installation of the Nexa3D XiP 3D printer
Once all the products are unpacked, the user will have to assemble the vat by fixing a Everlast-2 membrane on the aluminium part thanks to the four fixing clips. This resin tray is then installed in the printer by placing it on the fixing electro-magnets.
The vat rests on electromagnets that hold it firmly in place
As soon as the machine is turned on for the first time, via the button located at the back of the machine, we discover the 5.5″ color touch screen control. This one comes to merge in the front face and seems to disappear as soon as the machine is turned off.
The front of the machine being the same color as the screen, it seems to disappear when the machine is turned off. But as soon as the machine is turned on, the screen welcomes the user with an intuitive interface. The latter invites us to scan a QR code in order to associate the XiP with a user account and then to make sure that the 3D printer is well positioned. Indeed, the XiP must be placed flat, otherwise it will be possible to adjust the feet to level it. Third step, the 3D printer needs to be connected to WiFi.
Finally, a resin cartridge should be inserted to finalize the installation. This cartridge, coupled with an ultrasonic sensor, allows the automatic filling of the vat. It is interesting to note that during printing, the resin tank is always maintained at a sufficient level thanks to a flow system combined with the ultrasonic sensor.
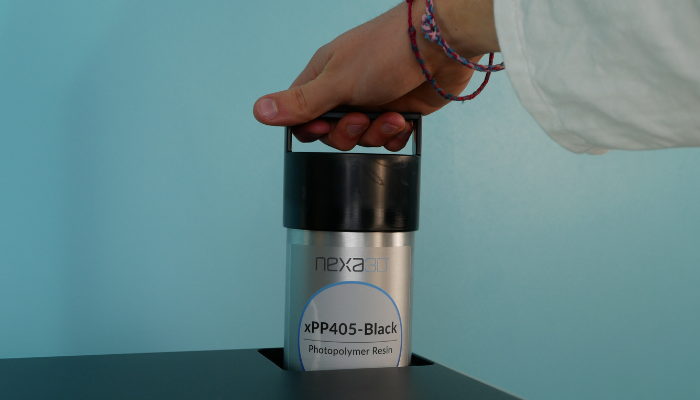
Proprietary cartridges allow for easy loading of materials
Generally speaking, installing the XiP is a quick and very intuitive process, simplified by the animations on the printer’s screen as well as the video tutorials available on the manufacturer’s website and YouTube channel.
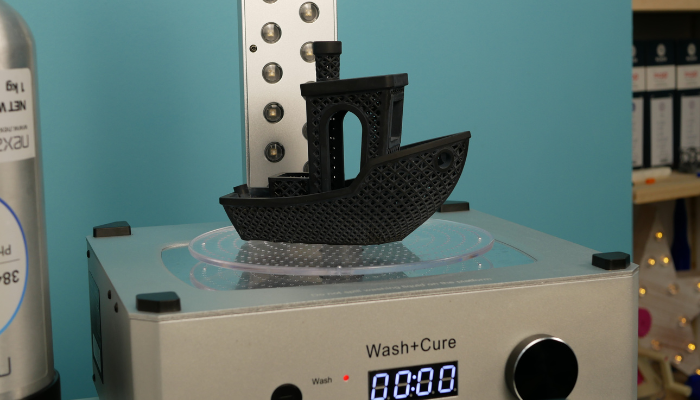
Regarding the post-processing machine, the installation is also easy since it is enough to install it on the work surface and to install a cleaning tray, filled with a post-processing solution (IsoPropyl alcohol or X-Wash, the cleaning solution provided by Nexa3D). For the post-polymerization (or curing), it will be necessary to remove the prints from the cleaning tray and to place them on the transparent tray of the post-processing machine, this one coming to fit in the same place as the cleaning tray previously used. Finally, once the reflective cover is installed, the post-processing can start. To adjust the parameters of the Wash & Cure, a button on the front of the machine can be used to toggle between the post-processing functions, while a potentiometer coupled with a 7-segment display can be used to set the operating time.
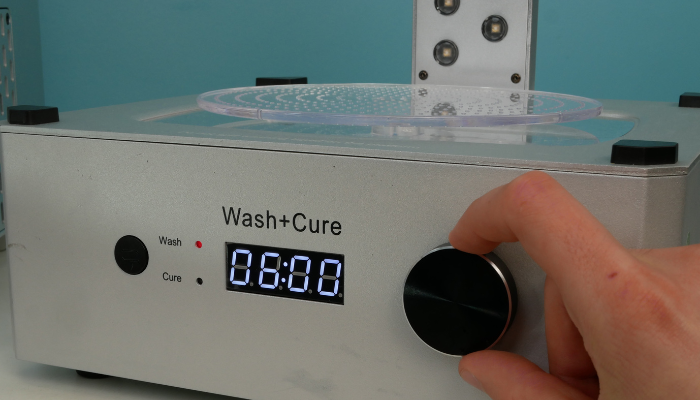
The post-processing machine allows you to easily clean and post-polymerize your prints
As previously mentioned, the XiP is a resin 3D printer that uses a proprietary technology called r for “Lubricant Sublayer Photo-curing”. This technology is based on the Masked StereoLithography Apparatus (MSLA) technology since it uses a UV light source masked by a monochromatic LCD screen. However, it differs from the MSLA process by using a lubricated membrane. The biggest drawback of “standard” resin printing is the tearing off of the printed layer on the membrane (each layer, once printed, must be torn off the membrane where it was printed to make room for the next printed layer). Indeed, when tearing off, some of the more fragile parts of a print can come off or even worse, the printed part can create an air draft and tear the membrane.
This is why some manufacturers have developed their own technology to “soften” the peeling of the layers. In the case of LSP-c technology, Nexa3D uses a slightly elastic lubricated membrane. The main advantage of this technology, compared to a conventional MSLA 3D printing process, is the speed of printing. Indeed, since the layers can be detached more easily from the membrane, it is possible to reduce the time of this usually time-consuming operation.
NexaX, Nexa3D’s Proprietary Slicer
Once the machine is unpacked and installed, it will be necessary to install the manufacturer’s proprietary slicer, simply named NexaX. This one, available on the manufacturer’s website, includes all the basic file handling operations and the standard printing parameters.
The NexaX software is also unique because it offers a premium version, at a not insignificant price of $1,199 per year, which gives access to more advanced printing parameters as well as gives users the option to use resins from other manufacturers.
NexaX is a very intuitive slicer that offers all the most common tools (moving parts, manual and automatic supports, estimating print time and material quantity) as well as interesting features such as duplication and stacking of parts (array) or simple STL repair and modification tools.
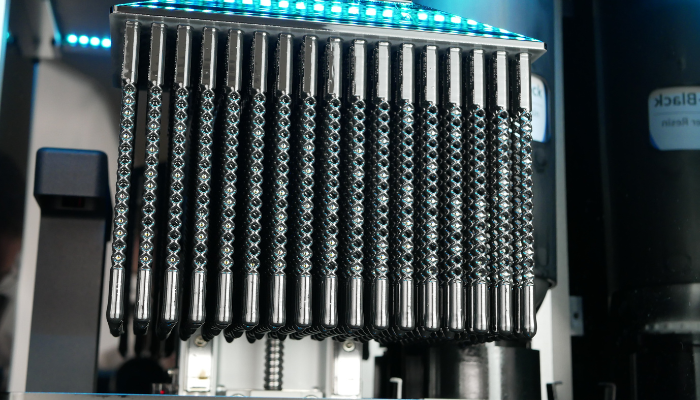
NexaX’s “Array” functionality allowed us to print, in series, 170 copies of a part
Despite its ease of use, the slicer has some notable limitations. First of all, it is only compatible with STL and OBJ files, while the 3MF format is entirely forgetten. During our tests, we also experienced slowdowns when generating media, duplicating, or saving large or complex files. In particular, we experienced these slowdowns when duplicating parts for the mass production of 170 units of a model. This problem could be mitigated by using a 3MF format, which is lighter to handle, in order to make the duplication and slicing of the part more fluid.
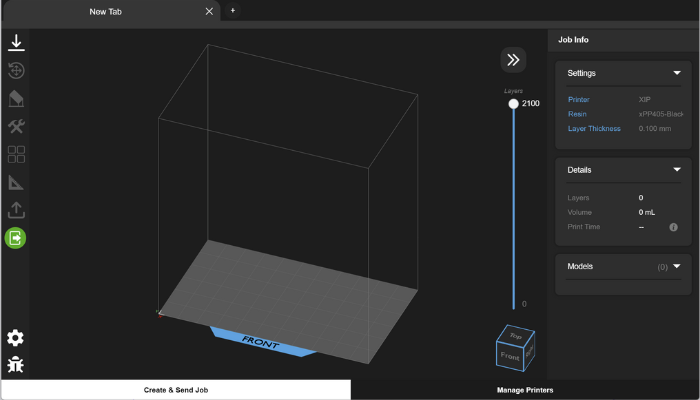
NexaX is an intuitive proprietary slicer developed by Nexa3D
Another interesting point is that in addition to its slicing options, NexaX includes a wireless management interface for connected 3D printers, a useful feature when managing a fleet of machines. Note, however, that it only works on a local network.
First 3D Prints With the XiP from Nexa3D
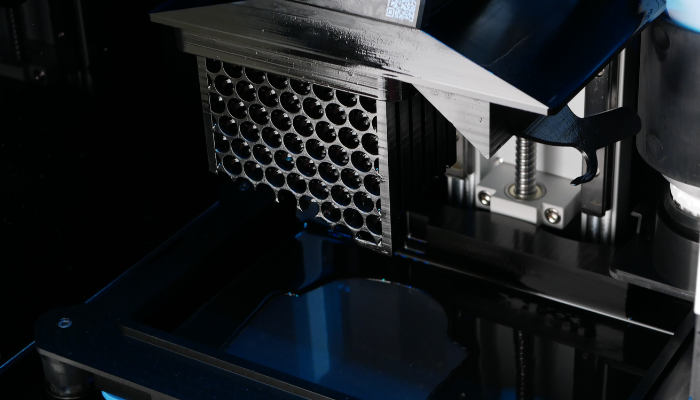
As soon as the resin tray is automatically filled, the XiP is ready to print. The parallelism of the printing plate is set at the factory, which saves the user a painstaking process and guarantees a plug&play experience. Thus, we prepare a print directly on the slicer and send it, via Wi-Fi, to the printer.
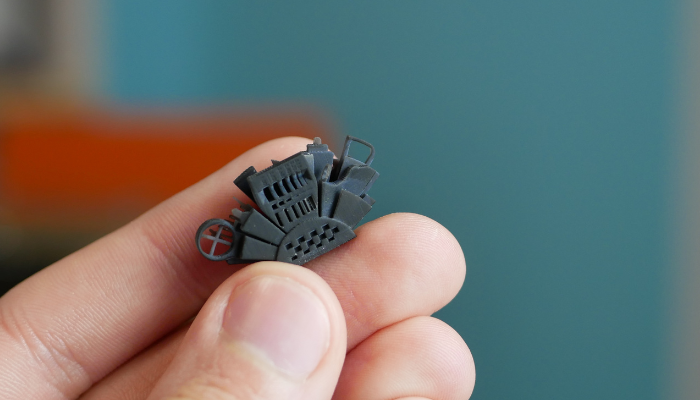
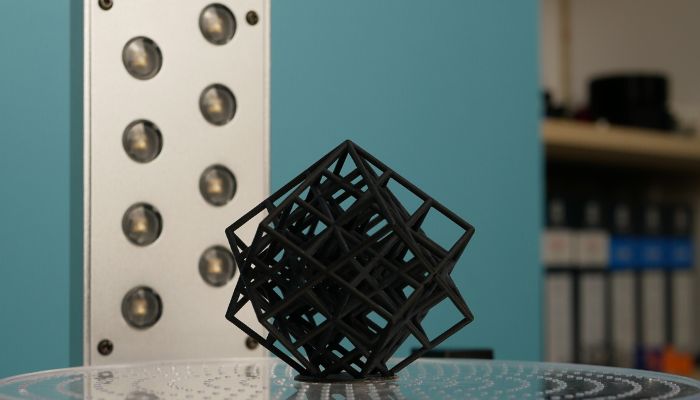
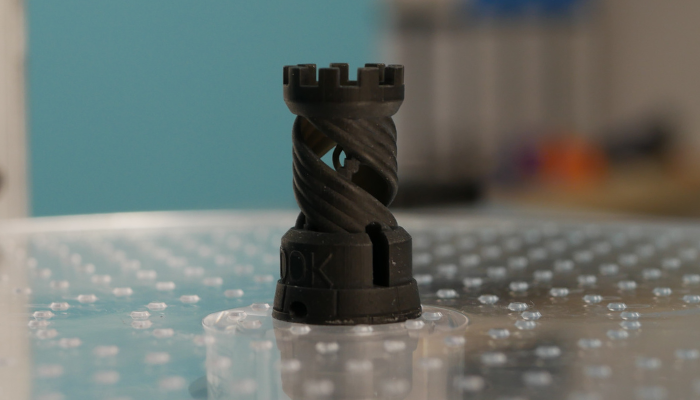
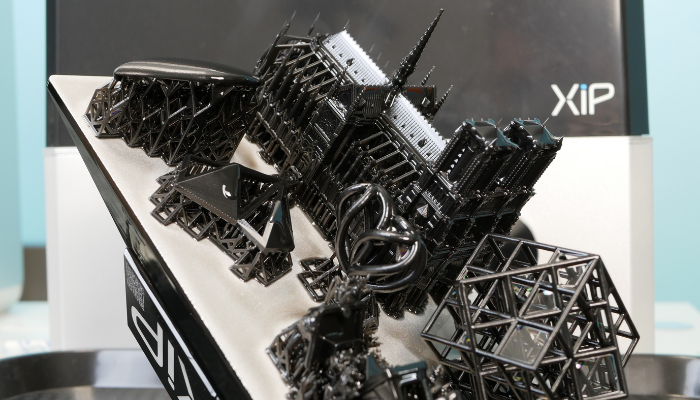
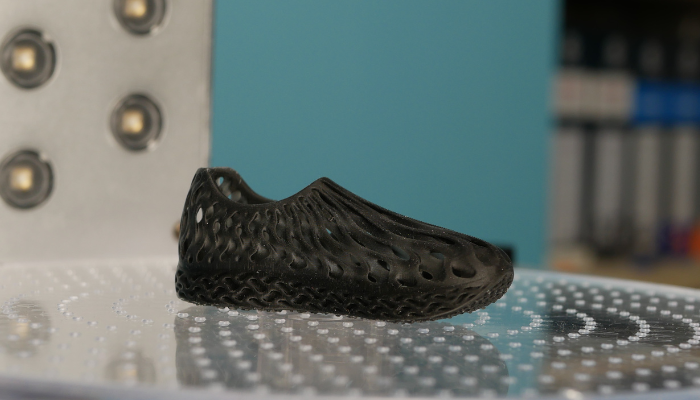
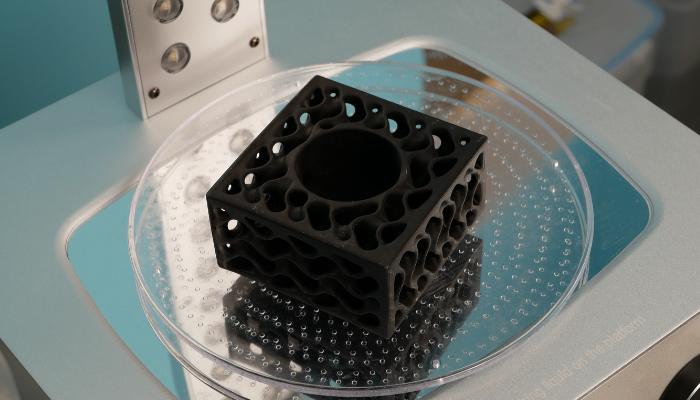
Once the first print is complete, we see a faithfully reproduced part without a hitch. This first result is a testament to the ease of use and reliability of the XiP. We then continued to print other parts with the xABS3843 resin without a hitch. Before switching to another resin, we emptied and cleaned the vat and inserted a new cartridge that automatically emptied into the resin tray.
The resin cartridges are inserted into the reserved slot and automatically discharged into the vat
The default profiles established for the California-based manufacturer’s proprietary materials allow for fast and reliable printing of all types of models, making the XiP a machine with good repeatability and broad compatibility with nearly two dozen materials.
Coupled with its post-processing machine, the XiP enables an easy and intuitive workflow. On this occasion, the manufacturer offers various contents and educational resources to master the ecosystem and understand the specificities of each material.
In terms of material management, installing and changing a cartridge is particularly simple as it is simply inserted into the dedicated slot in the machine where it is automatically discharged. Thanks to their integrated RFID chips, the cartridges can communicate with the 3D printer and the slicer to adapt the slicing parameters. However, we regret that these smart features are under-used, since the printer has no idea of the level of resin remaining in the cartridge, for example. Although the cartridges are reusable, the information on the material such as the expiration date, the batch number etc. cannot be updated either.
If the remaining resin level is not monitored, some prints may fail
Although the XiP is in the upper end of the resin desktop printer market, its entry cost is offset by a low cost of consumables (membranes, resins…) compared to other similar machines. In addition, the XiP is compatible with third-party materials (provided you have the premium version of the proprietary slicing software), which expands the portfolio of compatible materials and allows the use of less expensive resins.

Conclusion
- 3D Printer Features and Accessories 10/10
- Software 7/10
- Printing Quality 10/10
- Ease of Use 10/10
9.3/10
Pros:
- Easy to use (+ guides & full support)
- Speed
- Complete ecosystem
Cons:
- Material management
- Managing large files on NexaX
- Price (freemium software)
Designed to meet the demands of its customers, the XiP 3D printer is the first compact machine from the manufacturer Nexa3D, and democratizes its proprietary technology called LSP-c.
With its connected slicing software, its control screen guiding the user step by step, its cartridge system facilitating material changes, the numerous contents on the manufacturer’s website and YouTube channel as well as its two-in-one post-processing machine, the XiP’s ecosystem offers an intuitive workflow allowing the user to efficiently go from the 3D model import stage to the final post-polymerization stage.
The only drawback is the price to pay ($1,200 annually) to unlock all the features of the software and thus have access to the premium version of NexaX. Among the improvements that we would like to discover in the coming months: a better management of connected cartridges, the possibility to import files in 3MF format or an update of the NexaX slicing software in order to accelerate the calculations and avoid slowdowns during certain model manipulations.
More affordable and even easier to use than its larger siblings, the XiP 3D printer broadens the spectrum of users for the Californian manufacturer. With a starting price of $5,999, the XiP is in any case a good entry of the manufacturer Nexa3D on the market of desktop resin machines and a promising 3D printer that will compete with the existing players. You can find more information HERE.